Order Processing
-
1
Review
In this step, our quality control team reviews the order to ensure the order is correct and complete with no errors. If a product or pricing error is found, they will contact the dealer and customer before moving the order to the confirmation stage.
-
2
Confirmation
A customer service representative will contact you within one week of receiving your reviewed order. The representative will go through all the building's specifications, site requirements, permitting, scheduling process, warranties, answer any questions, and establish a lead time. If a permit is needed, the customer should apply and obtain the permit before installation.
-
3
Scheduling
Once the manufacturing is complete, a scheduler will begin mapping and planning the installation of your project. We contact the customer 3-5 days in advance of the crew’s arrival to confirm the entire scope of work including dimensions, components, colors, and the final balance due at installation. The customer will be asked to confirm and approve all aspects of building and contract.
-
4
Manufacturing
The manufacturing phase: This is where we begin to bring your project to life. Each building component is manufactured in our plants following the design and specifications of our certified engineered drawings. Once the completed components have passed quality inspections your building is ready for installation.
-
5
Installation
Customers must ensure a clear path for delivery of materials as close as possible to the install location and have a minimum of 3 feet clearance around the structure for ladders and the maneuvering of materials. Installers will install structures according to customer approved order form.
Customer sign-off
Once the installation is complete the customer and installation crew leader will sign-off on contract confirming approval of installation. At this point final balance is due.
Down Payment
A minimum of 10% down payment is required for all orders. Orders will not be processed without down payment. Customers must be informed that all down payments are non-refundable.
All special orders will require a 50% down payment. Special buildings include large commercial truss buildings and buildings not found on our standard price sheets. These will require custom made parts not regularly in stock.
Balance Due
Final balance is due at the time of installation. This final amount is subject to any labor fees that may arise during installation. All orders are C.O.D. by cash, check, money order, or credit card (Visa, Mastercard and Discover). Customers opting to pay the final balance with a credit card will incur a 2.5% fee.
Restocking fee
A restocking fee of $200 or 5% of the building price (whichever is greater) will be added to the final balance of the building in the event of one of the following situations.
- Customer canceling or rescheduling installation
- Alterations made to order after installation date has been scheduled
- Permitting issues that will not allow installation
- Incorrect or off-square concrete pad that will not allow installation
- Unlevel or obstructed workspace
Labor fees
Any abnormal factors that will require additional labor by installation crew may incur additional fees. This includes any work outside of the standard building structure such as building over other structures or cutting leg posts due to unlevel site.
RESCHEDULING
As in any construction project, there are issues that may cause for a reschedule.
-
1
Weather in the area or along the installation crew’s route may prevent safe travel.
-
2
Installation crews may encounter mechanical malfunctions with trucks or trailers.
-
3
Site not ready for installation such as unlevel ground or permitting issues.
1. Installation clearance
A minimum of 3ft leveled clearance is required around the entire perimeter of building for installation crew. This area needs to be clear of any vegetation, structures, or debris.
2. Mark installation location
Stakes or marks must be placed at all four corners of the desired installation location. The distance from stake to stake diagonally must be equal to ensure the building can be squared in the desired location.
3. Overhead Power Lines
All overhead power lines within 10 feet of the peak height of your building must be disclosed to our office prior to scheduling installation.
The Occupational Safety and Health Administration (OSHA) requires that equipment be kept at least 10 feet away from power lines with voltages up to 50kV. For lines with voltages higher than 50kV, the required distance is even greater (see OSHA Standards 29 CFR 1926.1400). When uncertain of a power line’s voltage, stay 20 feet away for voltages up to 350 kV and 50 feet away for voltages greater than 350kV.
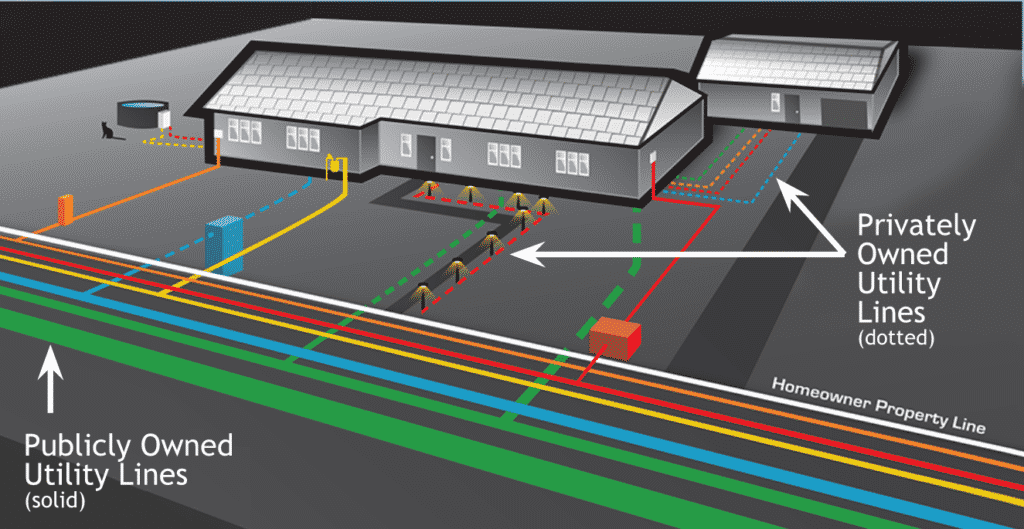
4. Call before you Dig
The customer must call 811 to have any utility lines marked prior to installation. The 811 center in each state will mark lines free of charge.
Note: Private lines are not marked by 811 and should be marked by the owner of the property.
Site Preparation
A few things we think you need to know to properly prepare your building site. If you have specific questions or concerns, you can always contact our customer service department.
Know the American Public Works Association codes
- White: Proposed Excavation
- Pink: Temporary survey marking
- Red: Electric line, cables, conduit, and lighting cables
- Yellow: Gas, oil, steam, petroleum or gaseous materials
- Orange: Commutations, alarm, signal lines, cables, conduit
- Blue: Portable water
- Purple: Reclaimed water, irrigation, slurry lines
- Green: Sewers and drain lines

How to ensure your site is level
-
1
Place stakes around installation location
-
2
Tie a string to the stakes around the perimeter
-
3
Place a string level on the string between each stake and move the string up or down until the string is level.
-
4
Once the string is level, the distance between the ground and the string should be equal (within 3”) along the entire perimeter of the building.
What happens if my site is not level?
Your site MUST be level for proper installation. An unlevel site may result in gaps under doors, corners, etc.
-
1
Your Installation will not be free. The contractor will determine the cost of installation based on the condition of the site
-
2
The building will be installed “AS IS” and all warranties are void
-
3
If the contractor is not able to install the building because of an unlevel site, a $200 or 5% restock fee will be added to your invoice.
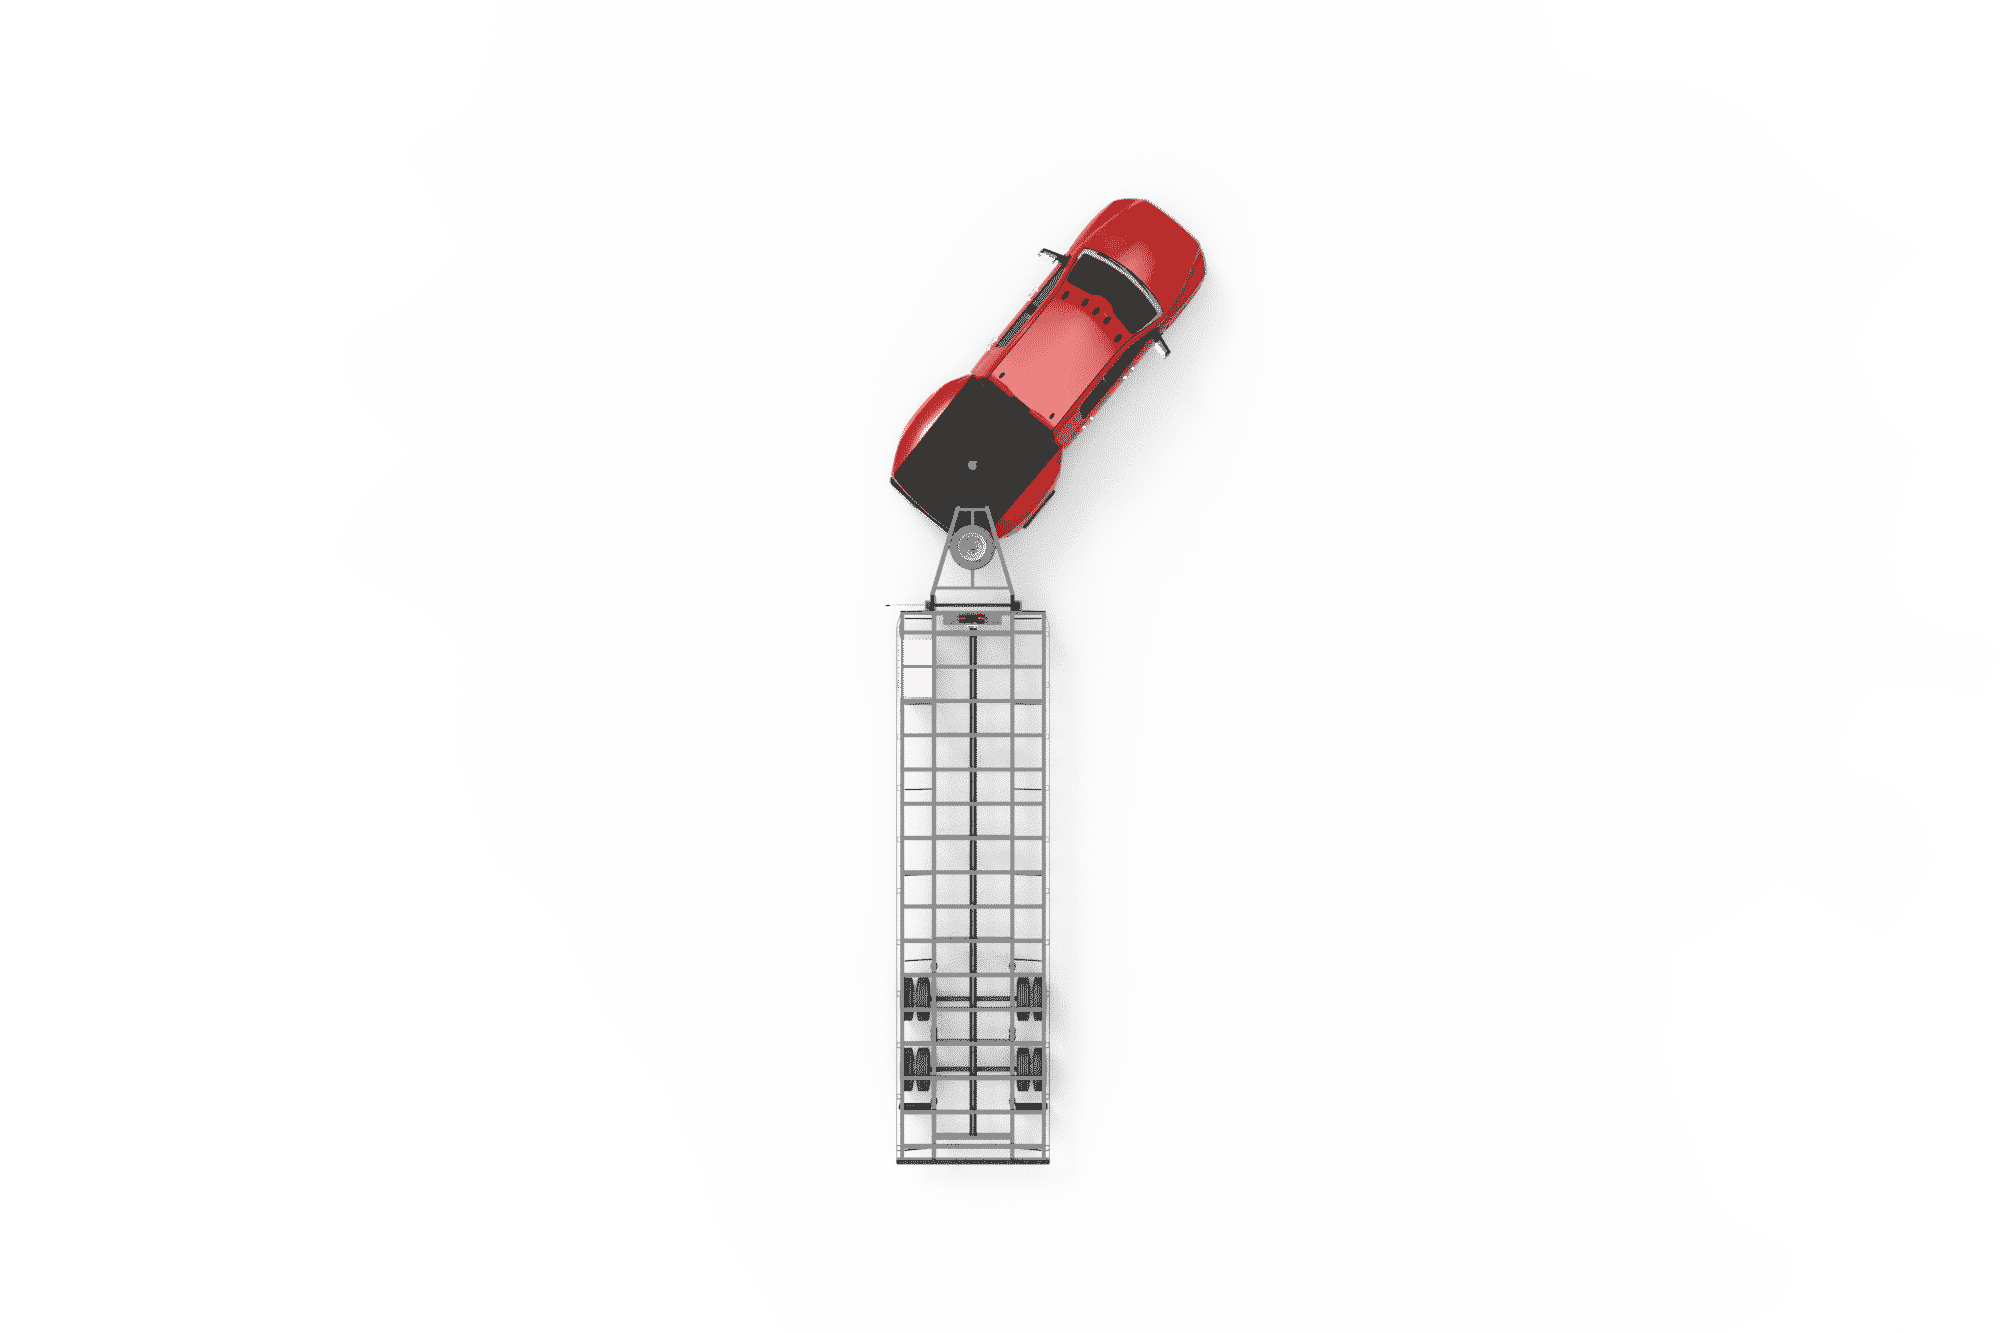
Standard truck length is 55 to 60 feet!
Is there a sharp curve, steep hill, or restricted work space?
Be aware of roads leading to your installation site. These must be able to accommodate the installation truck and trailer. You must also have adequate room for the installation crew to reach the job site, unload and turn around. Sharp curves, steep hills and a limited work space could hinder your crew, preventing installation.
CONCRETE SLAB
The foundation of your building is one of the most important aspects of your building. Ensuring that the concrete pad is poured properly will insure that you are satisfied with your building in the years to come and help prevent water intrusion into your building from under the base rail. Customers can pour the concrete to the exact dimensions of the building, however, when applying concrete anchors the foundation can be chipped or cracked at the edges for which Northedge Steel cannot be responsible.
CONCRETE PAD DIMENSIONS
Building: 18’x21’ will have a footprint of 18’x20’ due to frame being 1ft shorter than roof.
Concrete pad: 18’ 3” wide by 20’ 3” long.
SLOPE
Slope the 1.5 inches of exposed concrete all the way around the building in a .25 inch downward slope away from the building so that any water that falls onto the exposed concrete will roll away from the inside of the building
PRE-INSTALL CHECKLIST
PREPARE A LEVEL LOT
The installation location must be level to receive a FREE installation and to avoid labor charges.
UTILITY LINES
Mark any utility lines that lie underneath the planned installation site. If you do not know where these are, you may call 811 to have these utility lines marked at no cost.
PERMITTING
Customers should contact their local government office to determine if permitting is needed. If a permit is needed, the customer should apply and obtain the permit before installation.
INSTALLING ON RETAINER WALLS
Installation on retaining walls are handled on a case by case basis and you must contact our office for specific instructions and/or options.
CONCRETE PAD DIMENSIONS
If you are choosing to install over concrete make sure you follow our concrete pouring guidelines.
CLEAR SURROUNDING AREA
Move all obstacles in and around the installation location as well as the path leading up to it. An installation crew will need a minimum of 3 feet around the building to work.
PAYMENT
The final balance is due upon completion of your building’s installation. We accept VISA, Mastercard, and Discover for credit cards at a 2.5% processing fee. Money orders and cashiers checks are also accepted. Personal and business checks are subject for approval.
